Eclo ExpressThermo makes it very easy to program a logger.
Please note that this page doesn’t work in a tradicional ‘wizard’ style in which you have to go through all the parameters in order to program a logger. Only change the ones that you need and as soon as you are happy with those, you can tap or click the ‘Program’ button (illustration key F).
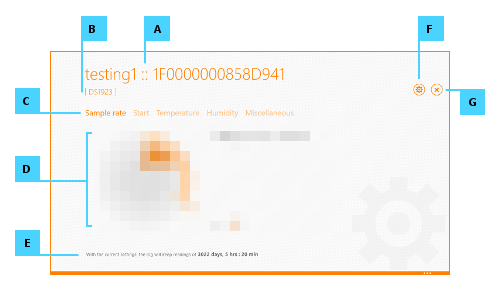
At the top you’ll find the logger’s serial number and its description (illustration key A) along with it’s model (illustration key B).
Bellow the logger’s ID, the several group parameters are presented (illustration key C). These parameters availability will depend on the model of the logger that was selected to program. The options for each parameter group are made available in the central area (illustration key D) and vary depending on the parameter that you are adjusting and also on the logger model.
At the bottom of the page (illustration key E) you can always find the log duration, that is adjusted according to the settings you choose.
Once you’re done with adjusting the parameters, tap or click the ‘Program’ button (illustration key F) to send the setup to the connected logger .
After the logger is programmed, or at any time you want to quit the logger programming, tap or click the ‘Cancel’ button (illustration key G) and you will return to the previous page.
Commands
The following commands are available in the Program logger’s bottom bar.
 |
Save the current parameters and settings as a template*. |
| Clear all parameters and settings to their default values/options. | |
 |
Load a previously saved template*. |
 |
Program a logger of a different model. |
 |
Enable continuous mode programming. |
* see templates for more details.
Sample Rate
Sample rate is the time interval in which the readings take place. Has a direct influence on how fast the log memory is filled with readings.
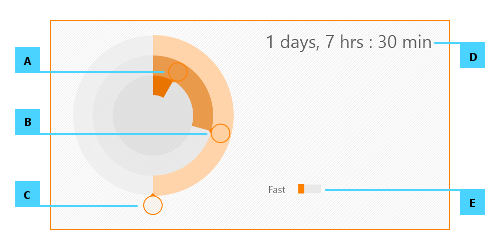
To choose a sample rate, drag the slide handlers for days (illustration key A), hours (illustration key B) and minutes (illustration key C). Some of these sliders may or may not be visible according to the logger’s model.
Some logger models also have the option to use a fast sampling mode. This mode allows adjusting the sample rate in seconds. To switch to this mode, change the switch to fast mode (illustration key E), by dragging its handler to the right. The outer slider (which is the only available in this mode) will change to seconds. You can switch back to ‘normal’ mode (as opposite of ‘fast’ mode) by dragging the ‘Fast’ switch handler to the left.
The actual sample rate is shown to the right of the sliders (illustration key D).
Start
Log start can be set to occur with one of the following options:
- immediatly after the configuration parameters are sent to the logger;
- after a specified interval of time;
- at a specific date/time.
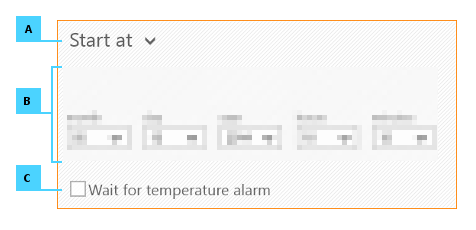
Use the combo box (illustration key A) to switch between those options. When the option requires extra settings, those will be shown underneath (illustation key B).
Some logger models also offer the option to start logging only after a temperature alarm occurs (illustration key C). The practical effect is that the logger will start take readings at the chosen sample rate, but will start storing the readings in memory when the first temperature reading crosses one of the set thresholds.
Tip: delaying the log start can be useful to make sure that the log will start only at the desired location, providing a time window in which the logger can be carried to that location. Another example is when a logger is programmed in advance to monitor a transport that will occur early in the following morning when there is no one at the office to program it.
Temperature
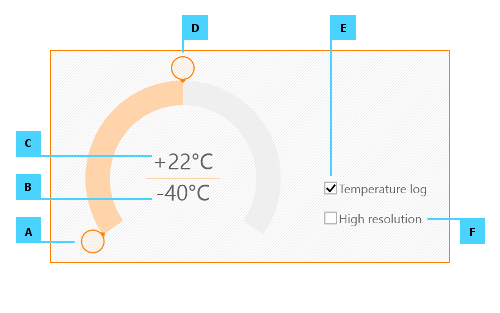
In this parameter group you can enable/disable temperature logging (illustration key E) as well as enabling high resolution readings (illustration key F), if the logger’s model supports this feature. These options have a direct influence on the log duration.
Here, you can also set the upper (illustration key C) and lower (illustration key B) thresholds for temperature alarms. The default threshold values match the upper and lower temperature range of the logger.
To adjust a threshold drag the corresponding slider (illustration keys A or D) until the desired value is reached.
Humidity
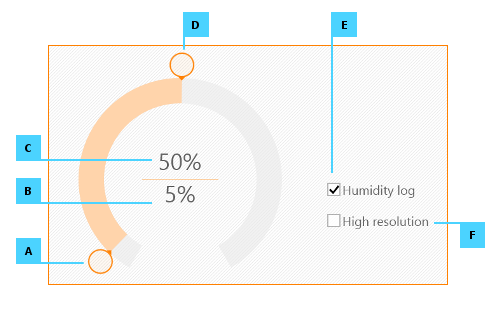
In this parameter group you can enable/disable humidity logging (illustration key E) as well as enabling high resolution readings (illustration key F), if the logger’s model supports this feature. These options have a direct influence on the log duration.
Here, you can also set the upper (illustration key C) and lower (illustration key B) thresholds for humidity alarms. The default threshold values are 0% and 100%, respectively.
To adjust a threshold drag the coresponding slider (illustration keys A and D) until the desired value is reached.
Miscellaneous
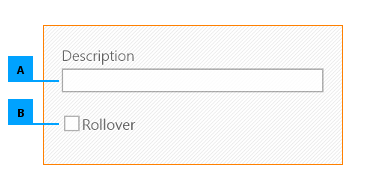
In this group you can assign a short description to the logger for its easier identification (illustation key A).
Optionally, there is also a setting to enable logging rollover (illustration key B). This means that when the logger’s memory gets filled with readings the oldest readings will start being replaced with the more recent ones. This way the logger’s memory behaves like a FIFO queue in a circular fashion. Enable this option if you feel it’s important to always have the latest available information. Be aware that you may loose log data in case the logger isn’t downloaded before the data starts to be overwriten.
Templates 
It’s very common that one often uses the same parameters to program the logger. To avoid having to repeatedly enter the same values, Eclo ExpressThermo allows you to save a set of programming settings and options as a template.
To make use of this feature it’s necessary to choose a folder where all templates are going to be saved. You can set this folder in the Preferences flyout. This operation is required to be performed only once. Please note that if you decide to change the template’s folder, you have to move the saved templates to the new location, otherwise ExpressThermo won’t be able to find them.
After adjusting all the parameters and selecting the options, bring the bottom bar into view and tap or click the ‘Save template’ button.
Continuous mode
This feature is much convenient when there is the need to program several loggers of the same model, with the same parameters, in a consecutive manner.
To program several loggers using ‘continuous mode’, adjust the various parameters as you usually do (or load them from a template) and before tapping or clicking the ‘Program’ button, activate the ‘continuous mode’, by tapping or clicking the corresponding button on the command bar (illustration key A).
When the ‘continuous mode’ is active, the button changes its look as shown in illustration key B.
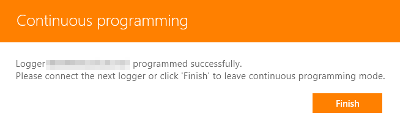
Once this mode is activated, tap or click the ‘Program’ button as usual and follow the instructions that will be shown, connecting and disconecting the loggers you want to program, one after another.
After programming the last logger, tap or click the button ‘Finish’ in the instructions dialog to complete this process.